
ShortPixel: Image Optimization for Photographers
One of the fastest ways for photographers to speed up our websites is image optimization, but there’s a lot of confusion on what the best methods are. After years of trial and error, I’ve finally landed on a process that’s keeping my website lightning fast, and I owe it all to one WordPress plugin: ShortPixel.
Full disclosure: if you sign up for ShortPixel using links from this post, I get a small percentage of the sale — but I would not be recommending it if I didn’t fully believe it’s worth every penny. If you’d rather not use an affiliate link, just go directly to shortpixel.com (not an affiliate link).
Why optimize your website images?
As photographers, we all want to show off our photos in the best possible light — but that does not mean we should be uploading high resolution photos to our website. More than 50% of website traffic comes from mobile users, and many of those are using data and not wifi to access your website. When you have large images on your site, it’s making your website load more slowly, and also costing people money.
You may be worried about optimizing your images, and whether they’ll show in a high enough quality to help you get bookings. I’m here to tell you it doesn’t matter. I personally cannot see a difference between the optimized and high resolution versions of my images when uploaded to my website, and I guarantee that my clients can’t, either. No one is going to zoom in on your photos to the pixel level to see how sharp they are — but many will leave your website if the photos are taking forever to load.
Does having optimized images actually matter?
Yes, yes it does. People who browse Google often click back to the search result page if a website is loading slowly, and many people don’t stick around to wait for a website to load fully if it’s taking more than 2-3 seconds max. Faster load times means more page views, a better experience for your website visitors, and can to a certain extent also help you rank better in searches.
Let’s take a look at these two screenshots.
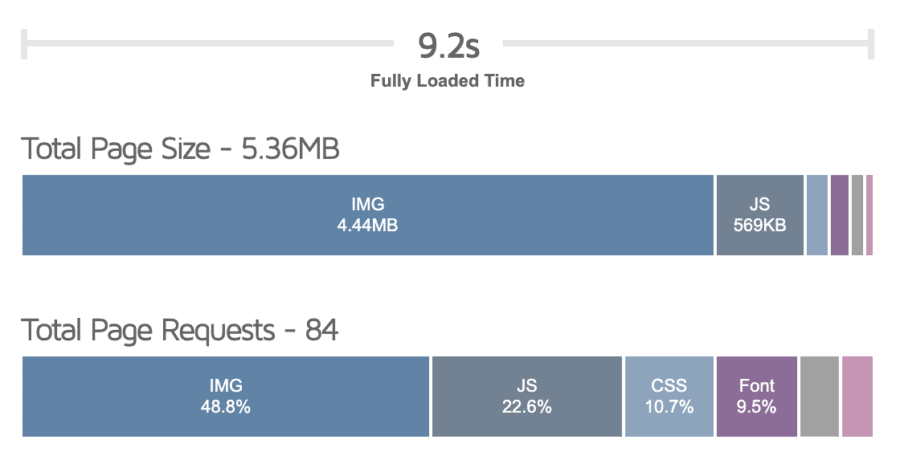
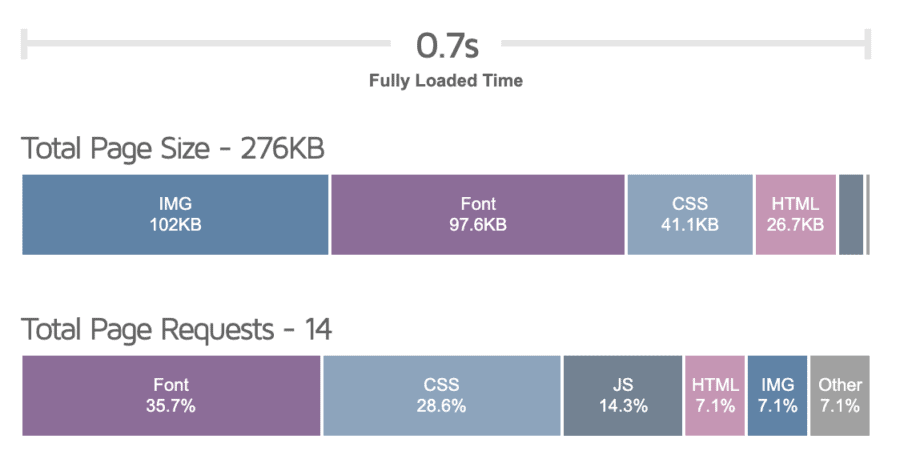
One website is loading 4.44MB of images, while the other is loading 102KB of images. Notice the difference in “fully loaded time” and “total page requests.” The lower the numbers, the better! Now you might be thinking that the faster website doesn’t have many images, if any, but that would be wrong — those are actually the stats for my own homepage, where I have 19 images total. I won’t say who owns the slower website, but it has almost the exact same number of images as mine — they’re just not optimized.
How does ShortPixel optimize images?
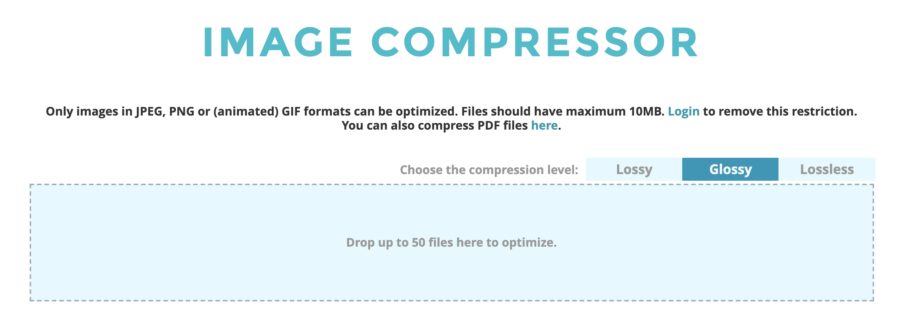
In their own words, “ShortPixel uses advanced compression technology that reduces image size without any before/after difference in quality.” You can process up to 50 images for free using the Compress tool on their website to test it out for yourself. Select the Glossy compression level — it’ll give you the biggest size savings without any visible difference to your photo.
ShortPixel WordPress Plugin
Convinced that you need ShortPixel in your life? The easiest way to optimize all your website images at once is to install the ShortPixel Image Optimizer plugin for WordPress, which you’ll find under Plugins and the “Add new” search in your WordPress dashboard.
After installing the plugin, you’ll need to buy optimization credits before you can run the bulk optimizer tool. Credits never expire, so I recommend buying more credits than you think you’ll need. The plugin will optimize your main image files, but also every thumbnail version of each image, which means that even if you think you only have ~5,000 photos on your site, it could easily be 5-10x that amount. 50,000 credits is a safe starting place for most photographers, but you might want to get more now since there’s a discount for buying larger packages.
To this date, I’ve used 137,588 credits on my own website.
Once you have credits in your account, you can go to your WordPress dashboard, select Settings, then ShortPixel. You’ll likely need to add your API key here for the plugin to work, which you can find in your ShortPixel account info.
Here are my own settings for the ShortPixel plugin. Please know that there are many different ways you can use this plugin, and what works for me might not be right for you. To learn more about what each of these settings do, read the ShortPixel FAQs and blog.
- Select Compression type: Glossy.
- Check the box for “Apply compression also to image thumbnails.”
- I personally don’t keep a backup of my compressed images in a separate folder, because I always have offline copies, but if you depend on your website media library as a backup option, you might want to select this option.
- Check the box for “Remove the EXIF tag of the image.”
- If you’ve had a bad habit of uploading full-size images to your website in the past, use the “Resize large images” option to resize them. I upload all my website images at 2048px max width/height, so I don’t use this setting in ShortPixel.
- Save changes, then go to the Advanced tab.
- Check the box for “CMYK to RGB conversion.”
- Check the box for “Also create WebP versions of the images.” (I don’t use ShortPixel to deliver the WebP versions, as I run that through WP Rocket — separate post coming on how I optimize WP Rocket soon!)
- Check the box for “Optimize Retina images.”
- Check the box for “Optimize other thumbs.”
- Check the box for “Optimize PDFs.”
- Check the box for “Optimize media on upload.”
- Click Save and Go to Bulk Process
You’ll only need to Bulk Process your website this once. After that, the plugin will automatically optimize any new images that you upload to your media library without you doing a thing!
Can I use ShortPixel if my website is not on WordPress?
If your website is hosted on Squarespace, Wix, or another non-WordPress platform, you can’t use the ShortPixel plugin to bulk process all the images on your website, but you can still compress new images with the Image Compressor on their website. It just adds an extra step or two into your media upload workflow, since you’ll need to upload images into the compressor, download the optimized images, then upload them to your website.
I highly recommend doing this on new photos that you’re adding to your website. For high traffic pages like your home page and cornerstone content it might be worth replacing the old photos with compressed versions, but I personally wouldn’t spend the time on manually optimizing and replacing every single photo on your website.
Will ShortPixel solve all my image speed problems?
While ShortPixel will reduce the size of your images, which again speeds up their loading, you’ll also need to lazy load images to fully speed optimize the image portions of your website. I use a plugin called WP Rocket to do this — a tutorial on how I use it is coming soon!
Was this intro to ShortPixel helpful?
Leave a comment and tell me if you found this helpful, or if you have any questions that I didn’t already answer!
About Nina Larsen Reed
Nina is an elopement photographer based in Boulder, Colorado. She plans and captures adventure elopements and micro-weddings across the Rocky Mountains, and loves teaching photographers about everything from permits and elopement logistics to marketing and SEO.
Thanks, Nina! This was very helpful!